Featured post

Interlocking Butterfly Card and Crafters Companion Subscription Box Review

first seen on Scrapbooking With ME I made this card from the products included in box 3 and some ink from my stash...

Sunday, 29 April 2018

Oriental Bloom Triple Tier Slider Card


Triple Tier Slider Card

 
With this card "How to" I have used Hunkydory Oriental Bloom. 
This card kit is form a couple of years ago but I have seen a few still for sale doted around on the web from  official stockists and the auction sites.  
The tier style of the card is also available in other kits from Hunkydory and other suppliers. 

(or you could design your own, I will demo this soon).


First step
Press out the smallest three-panel section and fold along the score lines. Bend the 8cm x 2.5cm foiled section to create the pull and stick it to the top of the center panel before closing and sealing the panels with High-tack tape.


Step 2     
Take the foiled three-panel section and fold it inwards with the slots portion on the right-hand side. Thread a 12cm printed band through the slots, wrong side upwards: fold the ends over each other and stick, making sure that the band will be loose enough to move up and down.
  
Step 3  
Repeat step 2 with the large three-panel section and the other band.


Step 4
To build the layers, add Hi-tack tape to the bands and fix the smaller section in place, making sure that the band is at the lowest point and the layer is below the top of the larger section.

 Step 5

Put Hi-tack tape on the outer edges of the layers and seal them before moving on to the next layer.


Step 6

Pull up the layers and fix the sentiment tag to the lower one and the foiled tag to the top one. using double-sided tape or glue.


Final Step

Complete the card by adding the frame to the front then centering the topper through the aperture. (i did not add the topper). 

Okay now that is the kit as it was meant to be, but i thought the lovely foiled card is hidden with this design. the kit comes with 4 triple tier cards so i used 2 in their organic form and them used 2 of the kits in my own adapted design. 

Oriental Side Stepper Card

I put this together with Hunkydory Adorable Scorable, the Triple Slider card kit, a small selection of Create and Craft card Illusions and Glitter, a  Die'sire Flower Die and Filigree Feathers Dies from Docrafts.  
please let me know what you think of this style and if you would like me to do a demo on this, 
but for now here are a few more images of the cards 


 Thank you, more to come soon.


Saturday, 21 April 2018

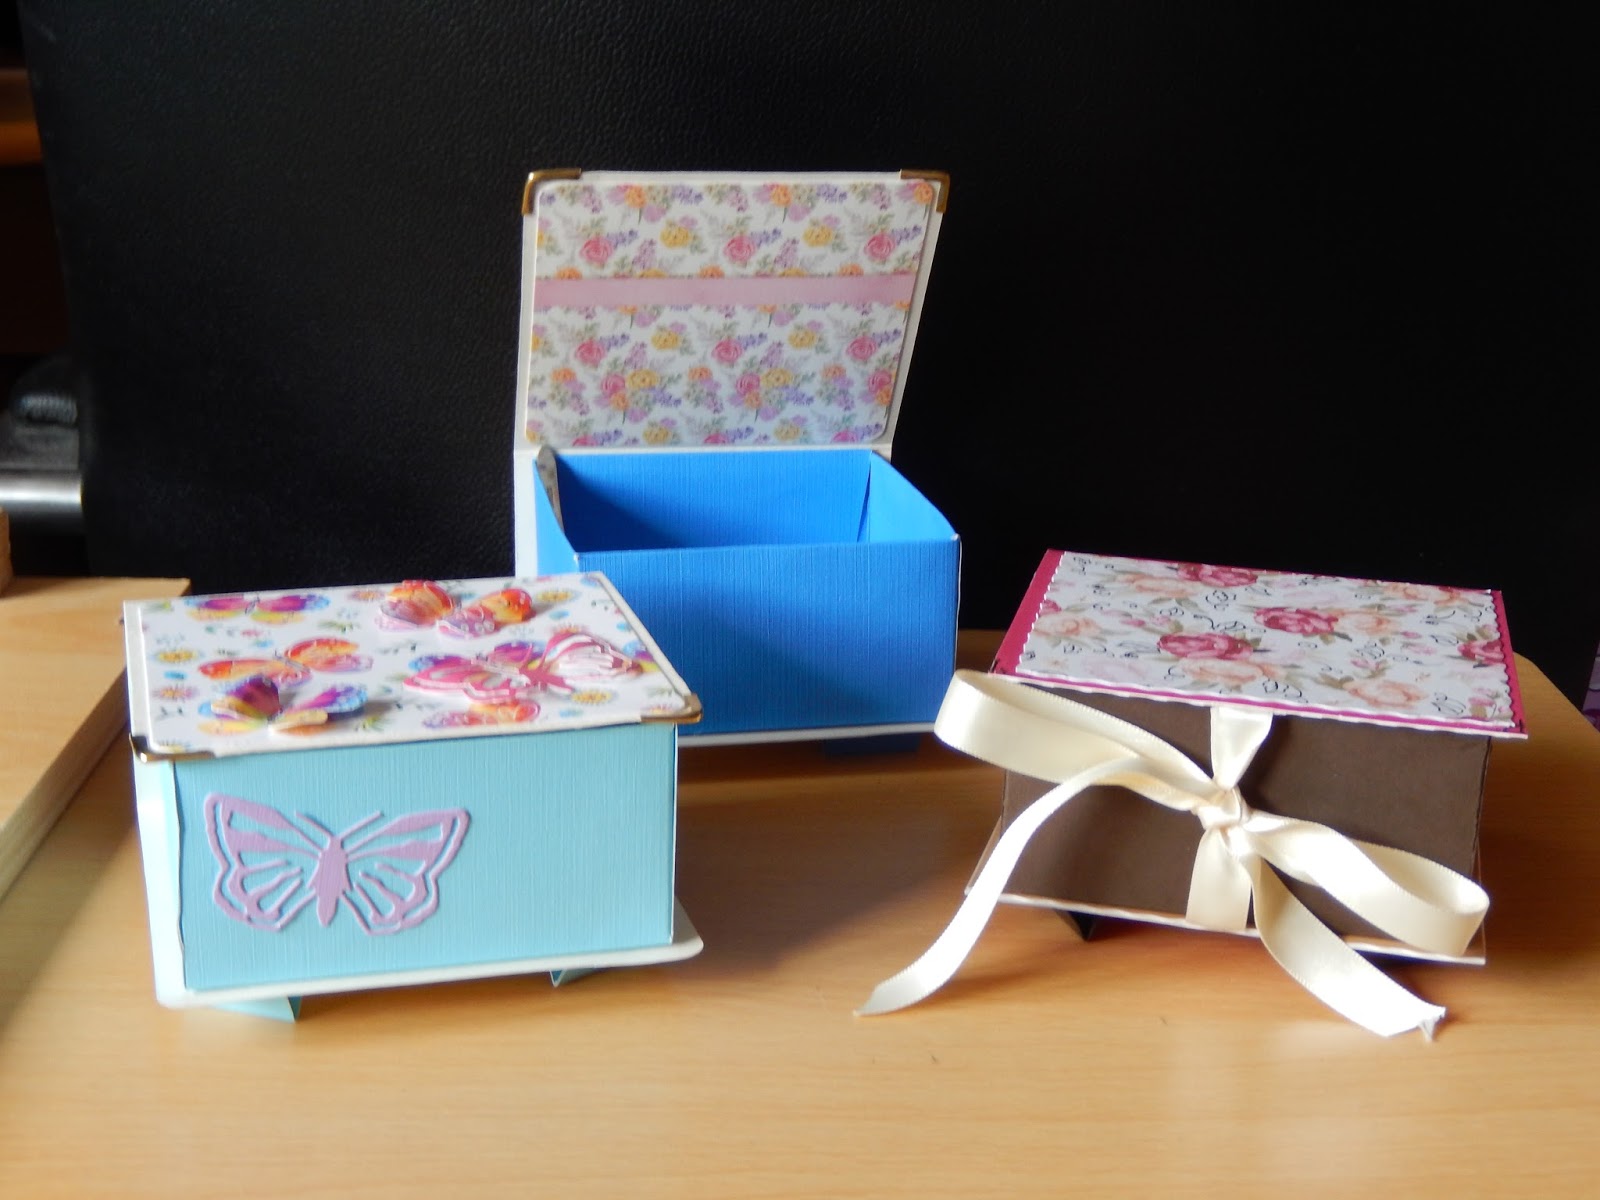
Oriental Trinket Box 

originally seen on 
This project is mildly simple but careful measurements and a little practice may be necessary. 
It takes 1 12"x12" piece of card and 2 A4 pieces of card.
A scoring tool and Ruler (although a scoreboard would be useful it is possible without)
a bone folder to define the score lines.
Scissors and High Tack Glue. 

Step 1

Cut patterned card to  get 4" x 4"1/4 , two of these 
and one coordinating  3"7/8 sq


 Step 2

Score the 12"x12" @ 2", 4", 8" and 10" turn and repeat.
Cut the 12" box base where indicated.  
keep 2 of the squares to make the feet.

Score the coordinating card @ 101/2 x 41/2 @ 41/4 (if using score board) move to just before the first notch and score at 63/8 (add a few mm if using ruler).


Step 3

Apply glue to the 4 tabs 
Glue down the box tabs inside the box base
 and fold and glue the sides.


Attach the two 41/2 to the top of the wrap around on both sides of what will be the lid
 of the box
 glue the smaller square to the inside of the box.

attach the box to base/lid wrap around and let it set aside to set.

Last stage

2 of the 2" squares will make the 4 feet
score each at 1/2" 1"  and 11/2"  
turn and score down middle, cut this score line.

fold score lines and glue one side to the other to make a triangle foot. 
see picture.
attach these to each corner of Box Base.

Optional 

if you want to close the box with ribbon attach the ribbon to the lid before gluing the 41/2" piece. and to the base before attaching the box.

decorate with flowers, gems, glitter or what ever looks good.

Wednesday, 18 April 2018

Relaunch

After a short break to finish my studies i have returned to the craft room and i am now ready to invite you to join me on my journey.

I will be posting tutorials, favorite makes and testing out some new purchases.  

The craft community is a sharing community and if i see something i like i will try it out for myself, where i have done this i will try to tag the original Crafter so you all know where i got the idea from. most of the time i will be putting my own style or spin on the idea and i will try to share what i found interesting and what i found difficult about the project.

My craft room has recently been featured in the Papercraft Inspirations Magazine and i was sent This Hunkydory Rose Gold Destinations Case kit, so i thought i would show you how i put them together.

this is a simple kit to put together.


Tools required: a bone folder, Ultra high tack tape and a wet glue.

The first thing to do is to burnish all the per-scored lines with the bone folder and attach the tape to the side sections as in the picture below,


I then used the wet glue run slightly over the tape to insure i had some wiggle time to get the side tags attached correctly insuring that they lined up and were secure.  I did this by positioning the side with no tags on the mat and bringing the sides to their position with the help of the bone scorer used as a guide inside to stop the sides slipping out of position.


after the sides are secure and the glue is set,
 (which will be fairly quickly if you have used tacky glue) 
you can use the other pieces in the kit to decorate the cases or use some flowers, gems 
and other items form your craft stash to personalize.